Fairy Pinwheel – This Really Blows!
This Totally Blows!
A Tiny Fairy Pinwheel, that is!
 I’ve been pondering this project for a month or more, trying to figure out just exactly how to do it…. I wanted it to twirl, like a real one, if you blew on it. I’m warning you now, this project is for the crazy crafty type. It’s finicky, and requires a few tools any serious crafter would already have on hand, namely a riveting tool called the Crop a Dial by We R Memory Keepers.
You need some silver mylar sticker off-cuts. Yes, I know you can’t just go out and find yourself some of that! But I had some. I got it from a very awesome store in Vancouver called Urban Source. It’s an adorable little place for ‘alternative art materials’. They collect useable off-cuts, discards and over-stock from 100 different local industries. You can find the most awesome one-of-a-kind art materials, and even better, all this stuff is being kept from the land fill! I’m sure most larger cities have a place similar to this.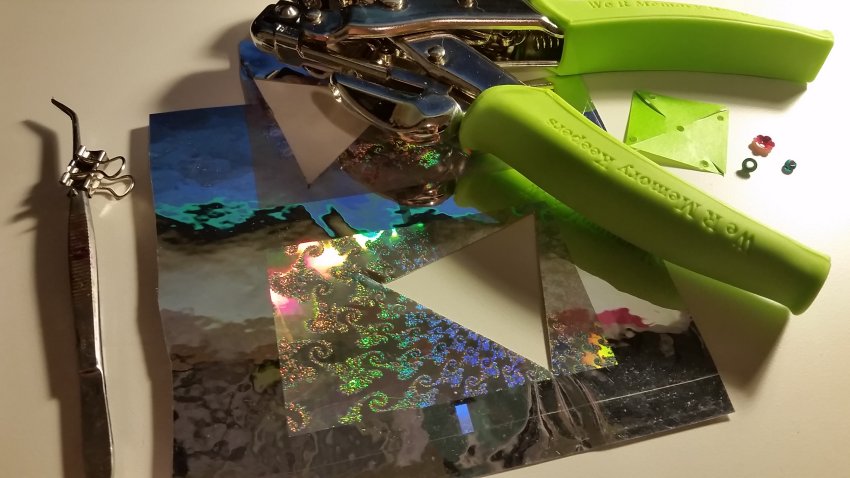
Anyway. Just recently we were there foraging for awesome fairy stuff, when I came across these sparkly sheets of mylar sticker off-cuts. I grabbed them, not knowing yet, what I would use them for.
And then it hit me! This is perfect for my itsy bitsy pinwheel. I had experimented with regular paper, but it wouldn’t bend nicely, it just folded in on itself. And, it wasn’t very sturdy either. I needed something that had some spring and would keep the bowed-out shape. I cut a little square of this sticker stuff, peeled off the backing and placed a piece of brightly colored paper on the sticky side. I now had a two-sided piece that could be bent into a pinwheel.
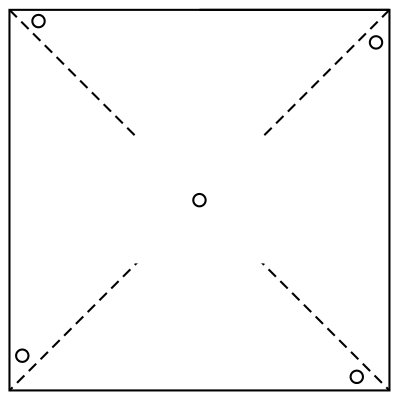 The measurements for this teeny tiny pinwheel are 1-1/4” square. I then punched a small hole in the center. Took some little scissors and cut lines up from each corner. I then punched little holes in every other point. I found that the easiest way to accomplish the finicky task of folding the pinwheel, was to take a round toothpick, poke it through the centre hole, and then bend each tip with a hole, onto the toothpick as well, putting a little dab of glue between each layer. I made a makeshift ‘clamp’ to keep the layers together while it dried, by using a pair of long tweezers, and then using a little fold-back clip to keep the tweezers closed. Once the glue had dried, I took my Crop A Dial riveting tool, punched through the existing center hole again, to make sure that I had a nice clean-edged hole down the center of all the layers …to fit the tiny rivet smoothly. Once the rivet was set in place, the hard part was over! I put a little seed bead and cute little sequin on a headpin, threaded it through the rivet hole, then the pinwheel, another bead on the back of the pinwheel, to give it a little room between it and the stick, for easy twirling. I found a little stick, drilled a 1/16” hole in it, and glued everything together. And there you have it. A Fairy Pinwheel.
Click here to open a PDF Pinwheel Template (Like the one shown above)
Click below to watch a quick video… it really blows!
Like I said, not for beginner crafters. But it’s so darn cute, it was worth all the effort. I hope our little neighbor friend is going to love it!
Have fun and keep the magic alive!
Cheers, Lorie